:: TVR Vixen Bonnet ::
Let's not go into the reasons for replacing the Vixen's bonnet... less said, the better. Unlike the S-Series in 2005 though, this time it wasn't my
fault!
:: Stripping the Old Bonnet ::
 The first step is to strip off all the bits from the old bonnet, to transfer on to the new bonnet. First I label up all the wiring and remove the
whole wiring loom from the front end of the car. I'm going to tidy that up when I re-install.
The first step is to strip off all the bits from the old bonnet, to transfer on to the new bonnet. First I label up all the wiring and remove the
whole wiring loom from the front end of the car. I'm going to tidy that up when I re-install.
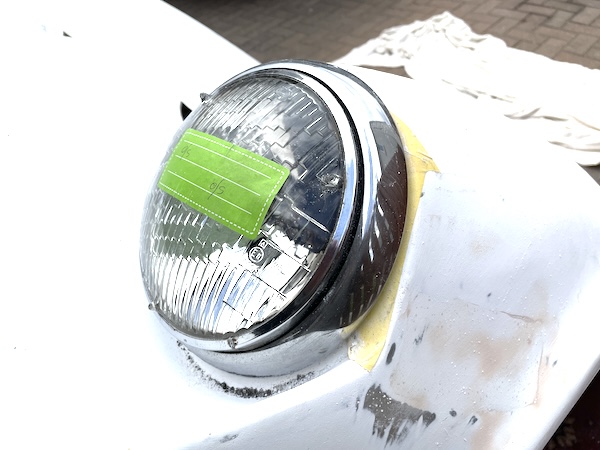
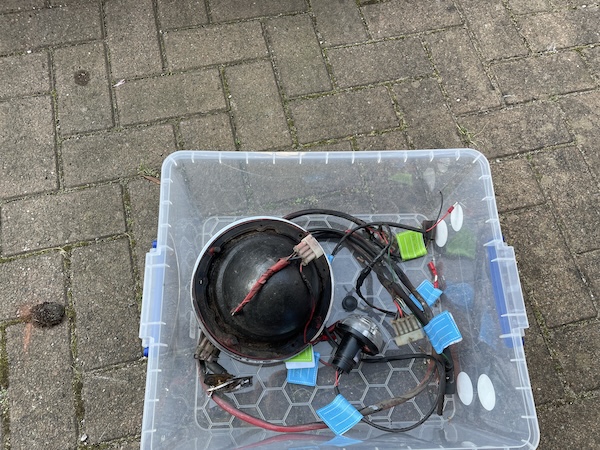
 Within a couple of hours, I have removed all these bits (albeit there's only one headlight in the box). The headlights were a bugger by the
way - the mounting screws were rusted to shit and I had to drill them out...
Within a couple of hours, I have removed all these bits (albeit there's only one headlight in the box). The headlights were a bugger by the
way - the mounting screws were rusted to shit and I had to drill them out...
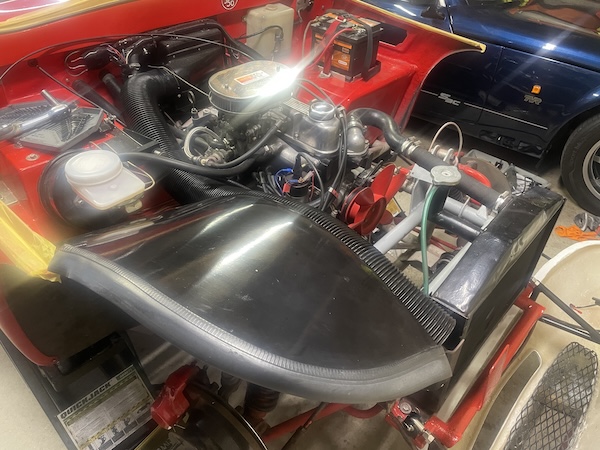
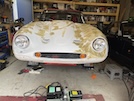
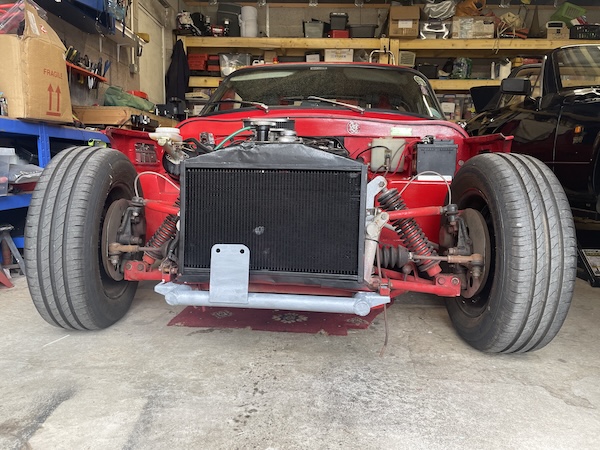
 And here's the front of the car de-electrified!.
The car had enormous side lights in front of the headlights. They were Land Rover Defender side lights, and they are too big and they look feckin'
stupid. The car would have originally had lickle itsy-bitsy sidelights (off a Royal Enfield motorbike or something) but I had to fit those enormous
things to cover the butchery of fitting holes carried out by the previous owner. As the new bonnet doesn't come pre-drilled, I will have the option
of fitting the original wee side lights, or even fitting no side lights at all, and getting new headlights with pilot lights included. I've only
driven the car in the dark once so far, and it was hard to tell that the headlights were even working, so an upgrade might be a good idea!
I remove the pipes to the windscreen washers - the washers are mounted in the bonnet so the pipe goes from the screenwash bottle, all the way
to the hinge at the front of the car, and then all the way back up the bonnet to the washer jets. That's about 10 feet of pipe, to travel about 10
inches... Anyway, the pipe disconnects easy enough at the hinge, with the end in a bottle because the washer bottle syphons empty as soon as I
split the pipe connection...
Then I can remove the washer jets - a couple of wing nuts on the back.
Then I remove the webbing and brackets that I installed to prevent the bonnet opening too far.
Then I remove the grills in the two wee bonnet vents - they are held into the back of the vent by 2 self-tappers each.
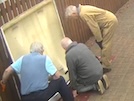
 Next, I prop the bonnet open and remove the two hinge bolts. The bonnet can then be moved away from the car and laid down on a couple of blankets
for further disassemply.
Next, I prop the bonnet open and remove the two hinge bolts. The bonnet can then be moved away from the car and laid down on a couple of blankets
for further disassemply.
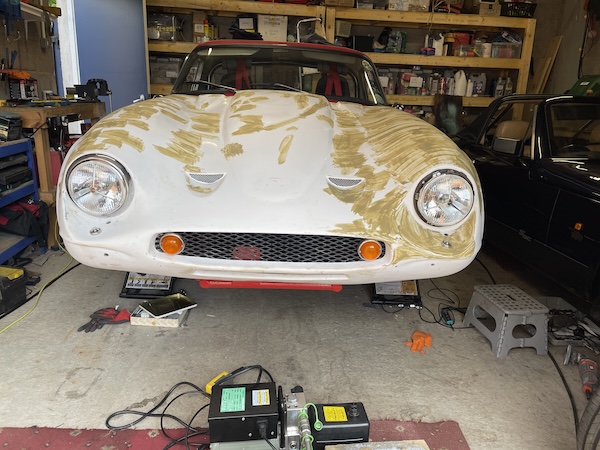
 That gets the car to here...
 The bonnet badge is held on with a couple of wee nuts...
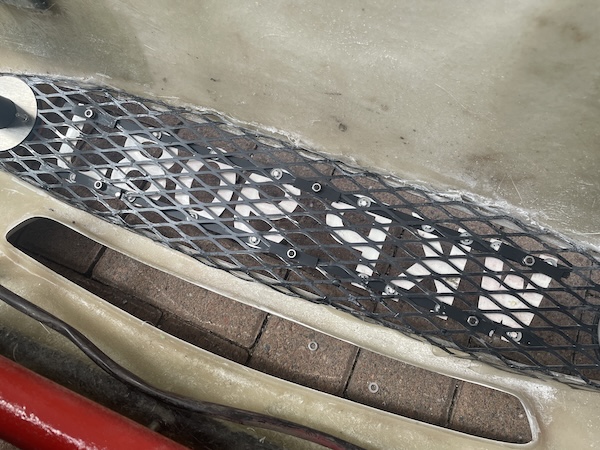
 The front grill is just held on by being pressed into a full tub of isopon behind the front valance. I'm able to crumble it off with a pair of
pliers, and then remove the indicators. I'll give it a wee matt black paint before I put it back. Or I might try to get a bit off the proper
diamond mesh.
The front grill is just held on by being pressed into a full tub of isopon behind the front valance. I'm able to crumble it off with a pair of
pliers, and then remove the indicators. I'll give it a wee matt black paint before I put it back. Or I might try to get a bit off the proper
diamond mesh.
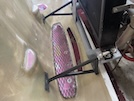
Last for today, I remove those enormous inner wheelarches. They are held on by a tube bracket to the chassis at the back, a bolt to the radiator
bracket at the front, and two self-tappers, one at the top and one at the bottom of the wheelarch in the body. The right hand one also has two
bolted cable clips and the plastic hose for the heater.
 And here it is, with everything removed, ready for the new bonnet when it comes!
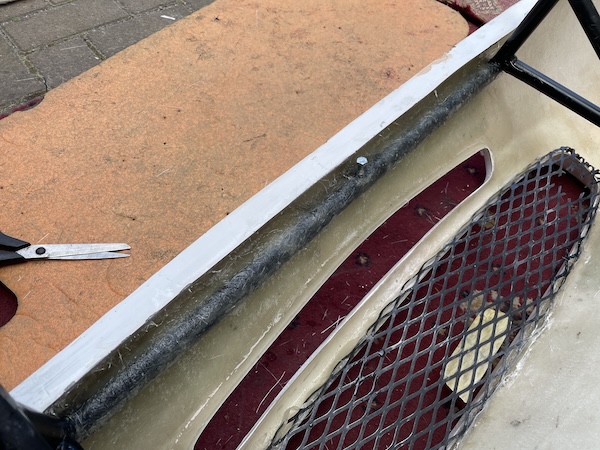
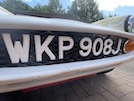
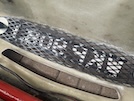
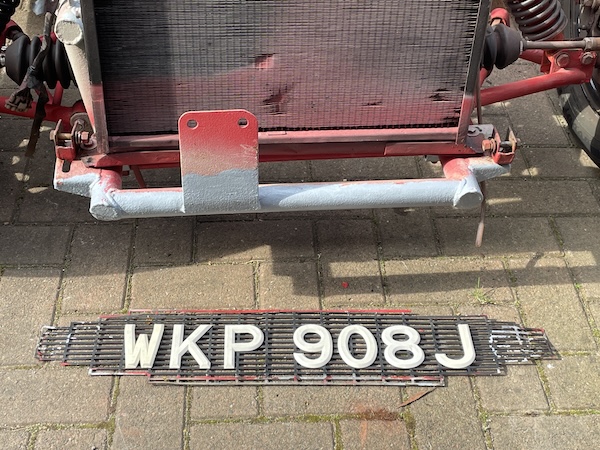
Then I can detach the registration letters from the front grille, which I am goping to replace, mainly because it's bent, but also because it's
the wrong mesh, with more metal than air holes. I'm hoping to get a bit of the original mesh, so need to change the letters over...
 They are held on with star washers on the back. The letters are only plastic so the likelihood of breaking one of the wee pegs is high!
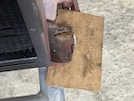
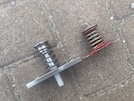
 I find this old worn out gardening tool, that has been sharpened so often there's nothing left of it...but it's ideal for prising off star washers!
Letters all off, and no pegs broken! Two star washers lost, pinging over my shoulder into a far corner... I'll flatten all the remaining washers
with a hammer for re-use. I'm sure I have some more to replace the missing ones.
I find this old worn out gardening tool, that has been sharpened so often there's nothing left of it...but it's ideal for prising off star washers!
Letters all off, and no pegs broken! Two star washers lost, pinging over my shoulder into a far corner... I'll flatten all the remaining washers
with a hammer for re-use. I'm sure I have some more to replace the missing ones.
 I also spray the radiator with VHT matt black paint that I have lying around, then I paint the front of the chassis that is inaccessible when the
bonnet is on.
I also spray the radiator with VHT matt black paint that I have lying around, then I paint the front of the chassis that is inaccessible when the
bonnet is on.
 I also remove these wee vents in the front wings - originally the roof pillar vents off a Ford Zephyr!
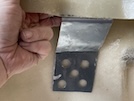
 These two brackets on the chassis are where the hinge bolts on. I've ordered new ones, so I remove these and paint the exposed chassis.
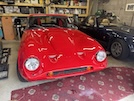
:: Preparing the New Bonnet Stage 1 ::
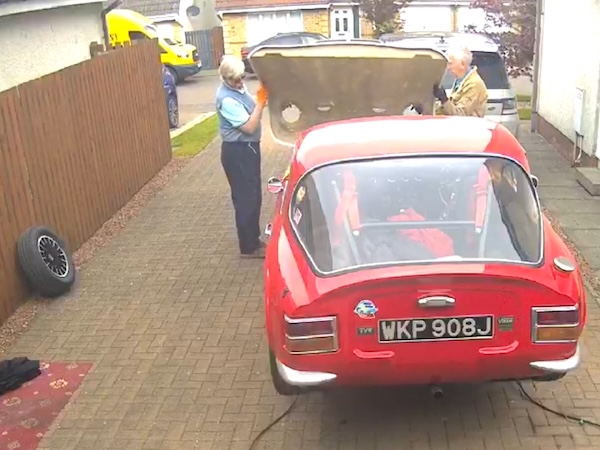
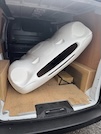 So it turns out that you can just about fit a Vixen sideways into the back of a Transit van... kindly transported from Grays Motoring
Solutions in the Midlands.
So it turns out that you can just about fit a Vixen sideways into the back of a Transit van... kindly transported from Grays Motoring
Solutions in the Midlands.
 The bonnet moulding is surprisingly lighter than the old one, but that could be because it doesn't have the hinge frame fitted, and it doesn't have
several layers of paint... Or it could be that it's just thinner fibreglass...
The bonnet moulding is surprisingly lighter than the old one, but that could be because it doesn't have the hinge frame fitted, and it doesn't have
several layers of paint... Or it could be that it's just thinner fibreglass...
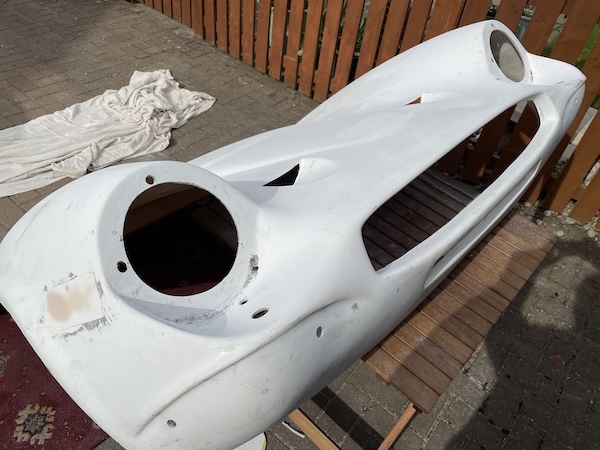
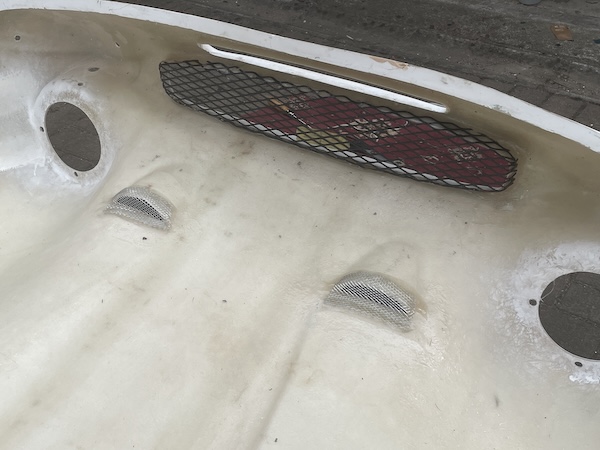
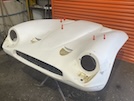
When I look at it properly, out in bright sunlight, I see that the bonnet is "straight from the mould" and needs a lot of finishing before painting.
Here's some close-ip photos of various bits that will need to be filled and sanded.


First, though, I need to cut out the headlight holes and the 4 wee grilles, and the vent in the rear edge of the bonnet.
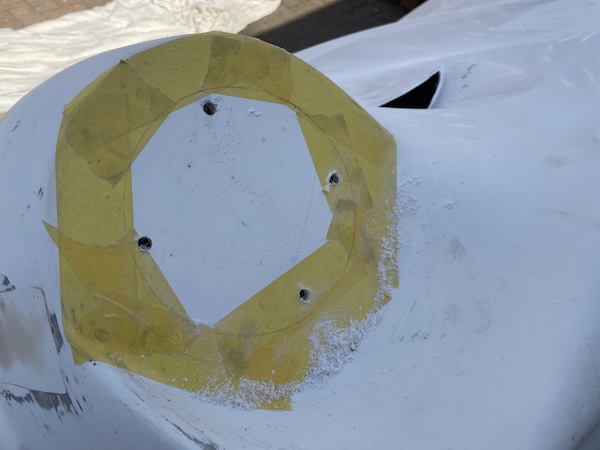
 So, on to marking up where the holes need to be cut. First the headlights. I take check measurements off the old bonnet, and then use a headlight
bowl gasket to draw the shape of the hole. I started applying masking tape to draw on, but realised that you can write on bare fibreglass with a
pencil...
So, on to marking up where the holes need to be cut. First the headlights. I take check measurements off the old bonnet, and then use a headlight
bowl gasket to draw the shape of the hole. I started applying masking tape to draw on, but realised that you can write on bare fibreglass with a
pencil...
 I make absolutely sure that the lights and trim rings will line up with the edge of the front wings...
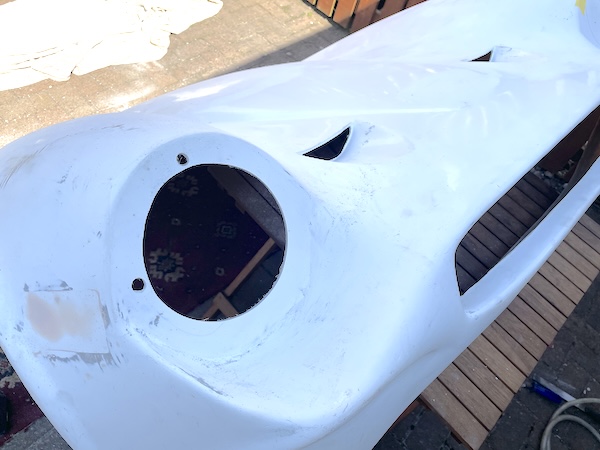
 Then I drill 6 wee holes to get the sawblade started in, and cut out the cirle between the holes, then tidy up the edges with a flap wheel.
 Then I use the rubber seal to mark the position of the holes for the adjuster screws, and drill those out.
 Perfect, or as near enough as it's gonna get!
 This is one of the wee grille holes. I've left a wee "lip" which I hope will make it look nice, and stop rainwaater from running in. You can always
cut any excess off later, but you can't cut it back on!
This is one of the wee grille holes. I've left a wee "lip" which I hope will make it look nice, and stop rainwaater from running in. You can always
cut any excess off later, but you can't cut it back on!
 Then I lift the back of the bonnet onto a wee table, and mark out the big rear vent in the same way. Again, note the wee "lip" along the bottom,
and I'm going to leave a wee "pillar" in the middle for extra strength.
Then I lift the back of the bonnet onto a wee table, and mark out the big rear vent in the same way. Again, note the wee "lip" along the bottom,
and I'm going to leave a wee "pillar" in the middle for extra strength.
I drill a couple of starter holes in the corners. I start off using an oscillating multi-tool with a half-circular blade, but it's a wee bit hard to
control. I also try the smaller "end-on" blade but that gets hot and is burning the fibreglass. Then I decide to try the air saw - the one that I
used to get the exhaust off the Porsche - and with a wee bit of care, I can run that along just inside my pencil marks.
 I finish off the shaping with a big grinding stone in an air grinder, and a smaller one in a multi-tool, then hand-sand it smooth. It could still
do with a bit of a clean-up, but that's not too bad at all.
I finish off the shaping with a big grinding stone in an air grinder, and a smaller one in a multi-tool, then hand-sand it smooth. It could still
do with a bit of a clean-up, but that's not too bad at all.
I realised half-way through this (when I got the first bit out) that this hole is double-skinned - there's a fibreglass brace that goes across the back
of the bonnet, right in front of the bottom of that vent. The bottom half of the new hole needs to be glassed in again and filled so it looks nice.
The job list grows longer!
None of these vents had mesh over them before, they were just open. I think I'll mesh them before I paint the bonnet though...
Next, the two wee vents at the front. These are a bit tricky because they're recessed into scoops, but they turrn out not too bad either...
 It's starting to take shape!
 I measure and drill out a pair of 25mm holes for the sidelights, and a pair of 16mm holes for the headlight ring screw (later to be filled in by a
rubber grommet)
I measure and drill out a pair of 25mm holes for the sidelights, and a pair of 16mm holes for the headlight ring screw (later to be filled in by a
rubber grommet)
Then I drill the holes for the bumper securing bolts. Question - how do you get the holes in the right place when you cna't see through
the bumper and a pencil won't fit through the bolt hole? Answer (in my case anyway) - put a tiny blob of red paint on the end of a flat punch, and
use that at the right angle, to mark the hole positions. I fit both bumpers temporarily, to make sure that I won't have to do any drilling once
everything is painted.
 Next, the front indicators - I have the "correct" Sparco indicators, but unlike the "wrong" ones that were on before, these have a body that has to
go through the front grille. I use the backing plate as a template, and cut out a hole with tin snips. So now I know that those fit!
Next, the front indicators - I have the "correct" Sparco indicators, but unlike the "wrong" ones that were on before, these have a body that has to
go through the front grille. I use the backing plate as a template, and cut out a hole with tin snips. So now I know that those fit!
Next, I mark up the locations of the holes for the windscreen washer jets, the TVR badge and the headlamp mounting screws, taking measurements off
the old bonnet.
And that's all the drilling done!
:: Preparing the New Bonnet Stage 2 ::
 Now you can glass in the new grilles and fit all the new goodies, to make sure everything fits properly before you take it all apart again for
painting.
Now you can glass in the new grilles and fit all the new goodies, to make sure everything fits properly before you take it all apart again for
painting.
First, I'm going to make the front grille, and the little grilles that go in the bonnet vents.
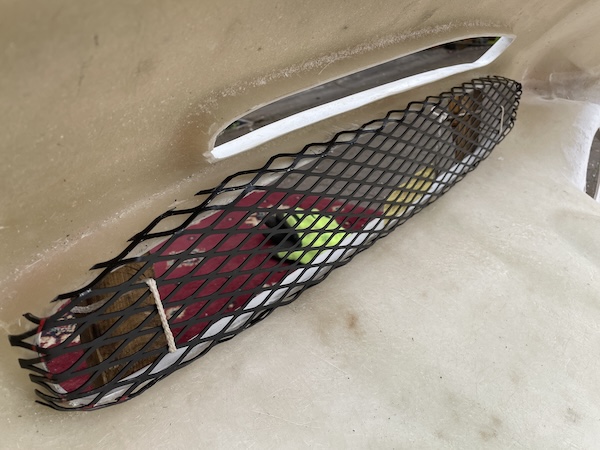
I have the correct black diamond mesh for the front grille, so I start by holding a bit of cardboard behind the front of the bonnet, and tracing the
shape on to the cardboard. Then I tape the cardboard to the mesh, and cut around it leaving an overlap of about 15mm all the way round. Trial fit -
looks ok...
Then I grip the edge in my vice, about 3 or 4 mm from the edge of the cardboard, and bend it over about 45 degrees or so. I work my way round the
top edge and trial fit - looks ok! Same again for the bottom edge and the ends.
 After a wee bit of adjustment with pliers, it looks like this...
 and it fits like this! I'm going to fix that in with resin and a strip of matting - how TVR should have done it, instead of just embedding it in
half-a-tin of body filler.
and it fits like this! I'm going to fix that in with resin and a strip of matting - how TVR should have done it, instead of just embedding it in
half-a-tin of body filler.
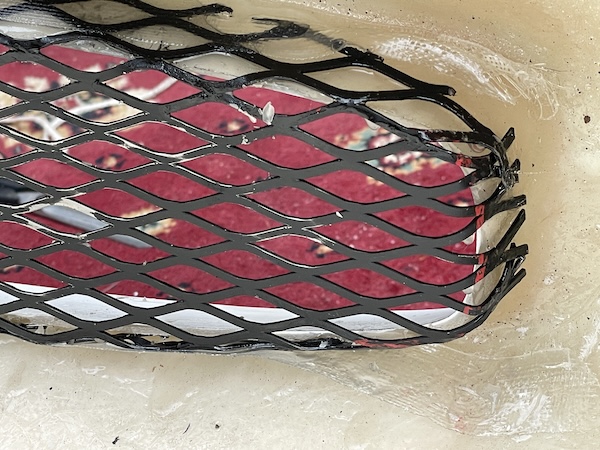
 Then I rig up a way to hold the grille tight into place while I glass it in...
 Two bits of cord, two bits of wood and a couple of screwdrivers to apply just a wee bit of tension...
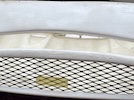
 Here's the front grille, all bent to shape and glassed in tight - and not a trace of filler!
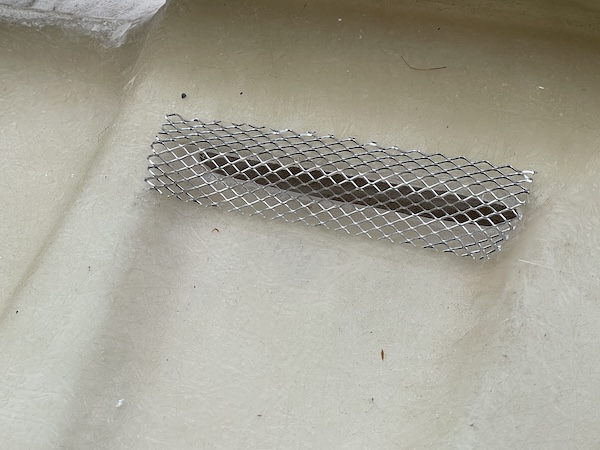
 I also have a sheet of much finer aluminium mesh that I bought in B&Q. Again, with the help of a cardboard template, I cut off 2 bits for
the rear vents, and push those into shape...
I also have a sheet of much finer aluminium mesh that I bought in B&Q. Again, with the help of a cardboard template, I cut off 2 bits for
the rear vents, and push those into shape...
 And another couple of bits shaped for the front vents. I glass all of those into place.
 Here's the inside of one of the wee grilles at the back of the bonnet, glassed in with glass tape and resin...
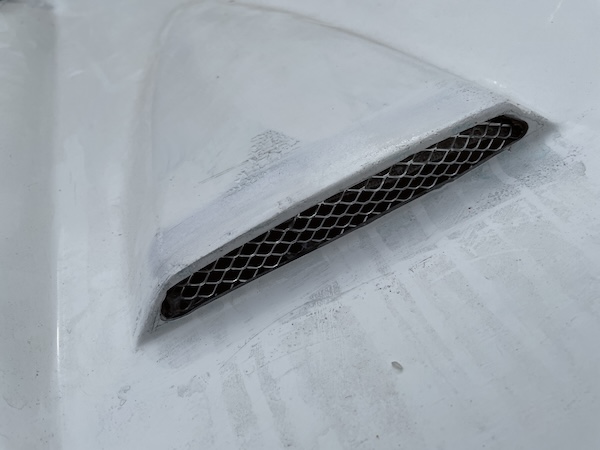
 and here's the outside!
 Pretty happy with that!
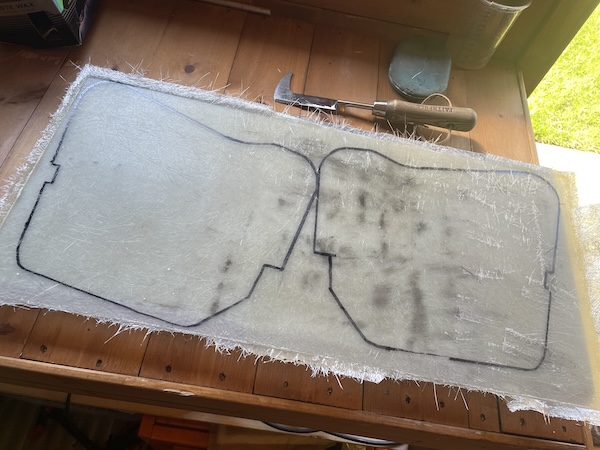
Next, the longer vents at the very rear edge of the bonnet need a bit of fibre-glassing to re-attach the double skin and fill in the gap between.
First, I apply a layer of matting along the rear brace of the bonnet to replace the wee bit of "double skin" that I cut out to take those larger rear
vents. Once that's cured, I'll fill in the gap and sand it down, before making a couoke of wee grills for that.
Next day, I re-shape the vent slots roughly with a hand file and then a multi-tool sander.
Then I need to fill in the double-skin in the bottom of the slots. I've already glassed over the bottom so I need to fill the inside. I get some
Isopon P40 (the one with glassfibre mixed through it) and press it down into the gap, and give it some elementary shaping, before removing any excess
with acetone.
 It's much better but still needs a wee bit of shaping on the internal corners.
Then I give it a couple of thin spreads of filler to build it up to the right height, then file it flat and sand it, just to finish the shape of that
bottom lip.
The rest of the bonnet still needs a lot of prep before painting though - there are lots of moulding marks and joins that have to be sanded and
filled, and that could still take a while!
So I mix some Isopon P38 filler, and fill in some of the joins. It looks like a wee separate panel has been let into the bonnet where the badge
goes, and also two wee panels where the side indicators go (which I'm not re-fitting). The panel joints aren't exactly hidden. With the filler
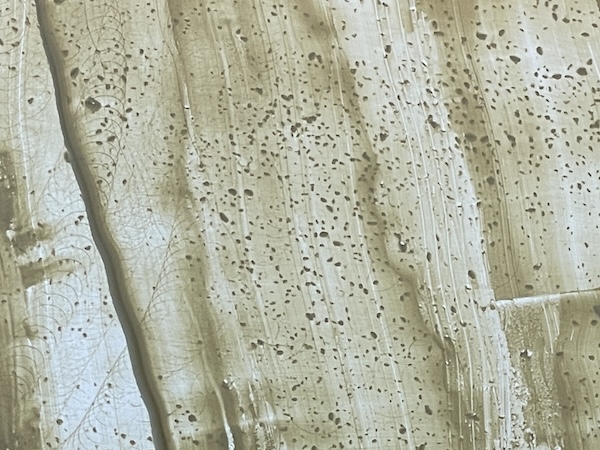
rubbed down, it's a lot better - but there's also a lot of wee pinholes (a lot! and a slight scratch down the central hump (which could have been
me, don't know). The're not coming out with the sander. and I don't want to go through the gel coat.
 I go around the bonnet with a tube of knifing stopper and a wee plastic spatula. By the time I've covered all the surface defects I can see, the
car looks like a dirty protest on curry night in a Calcutta jail.
I go around the bonnet with a tube of knifing stopper and a wee plastic spatula. By the time I've covered all the surface defects I can see, the
car looks like a dirty protest on curry night in a Calcutta jail.
 Here's one area as an example, on the top of the offside wing (probably the worst bit, to be fair). You can see that the stopper has even filled
the slight swirl marks from the initial sanding - those will be removed by a final fine sanding after all the paint blemishes are filled.
Here's one area as an example, on the top of the offside wing (probably the worst bit, to be fair). You can see that the stopper has even filled
the slight swirl marks from the initial sanding - those will be removed by a final fine sanding after all the paint blemishes are filled.
TAt this stage, I decide to visit the paint shop to confirm a date for painting. This is where I receive 2 bits of information:
1. Although he said that he would only need around 2 weeks notice, he now says he has no available time for 2 months;
2. It's not a good idea to use knifing stopper for pinholes in glassfibre because it doesn't set properly. Too late, I've covered the car in the
bloody stuff. It's not the end of ther world, as it goes brittle when it's baked, and he'll be able to remove it when he dries out the glassfibre
before painting. He suggests that I leave it alone for him to deal with (which I suspect is his way of saying "don't make it even feckin' worse you
thick bastard".)
So, let's move on to...
:: Fitting the New Bonnet ::
 So now it's on to trial fitting the bonnet to the car. Each bonnet (and each car) is different, so the bonnet has to be individually fitted and
adjusted to fit each chassis and body. First, the hinge frame is fixed to the chassis, and the bonnet is then positioned on the car and all gaps and
clearances checked, so that the frame can be glassfibred into the bonnet in exactly the right position.
So now it's on to trial fitting the bonnet to the car. Each bonnet (and each car) is different, so the bonnet has to be individually fitted and
adjusted to fit each chassis and body. First, the hinge frame is fixed to the chassis, and the bonnet is then positioned on the car and all gaps and
clearances checked, so that the frame can be glassfibred into the bonnet in exactly the right position.
The first task here is mounting this new bonnet frame to the chassis. I've bought quick-release hinges, you know, just so that you can whip the
bonnet off altogether every time you stop.
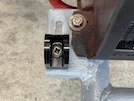 Here's the offside bracket mounted to the chassis. So far so easy...
 The nearside bracket is more difficult, because the radiator bracket is slightly too wide, so prevents the hinge bracket from being adjusted
backwards or forwards when fitting the bonnet.
The nearside bracket is more difficult, because the radiator bracket is slightly too wide, so prevents the hinge bracket from being adjusted
backwards or forwards when fitting the bonnet.
 I take out the radiator mounting bolts and lift it slightly onto a bit of thin ply, while I angle-grind a bit of the bracket off.
 That's better!
 I mount the frame in the brackets, put in the pins and there we go! I have the brackets in the middle of their for-and-aft adjustment, and the
bonnet frame pretty much half-way through its up-and-down adjustment, to allow for final adjustment once I get the bonnet in place.
I mount the frame in the brackets, put in the pins and there we go! I have the brackets in the middle of their for-and-aft adjustment, and the
bonnet frame pretty much half-way through its up-and-down adjustment, to allow for final adjustment once I get the bonnet in place.
 This is it in approximately its "bonnet down" position.
 This shows the approximate position of the hinge frame in the front of the bonnet. It has to be finalised with the bonnet on the car though, and
that needs two helpers to lift it and hold it in place while I mark it up.
This shows the approximate position of the hinge frame in the front of the bonnet. It has to be finalised with the bonnet on the car though, and
that needs two helpers to lift it and hold it in place while I mark it up.
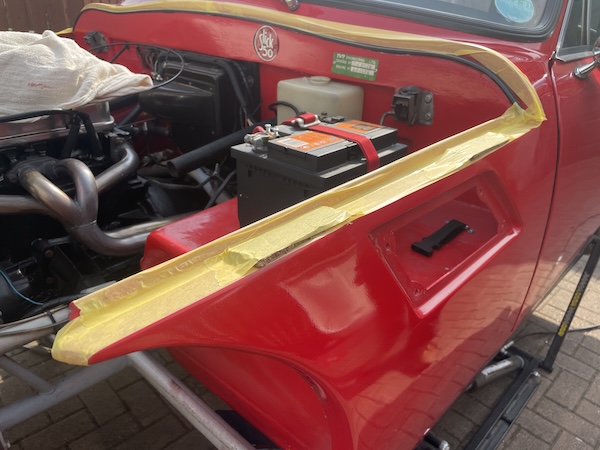
 The first step in getting the bonnet to fit, is to run masking tape along the edges of the body, to protect the paint. Then tape narrow stips of
plywood to that to create the correct bonnet gap.
The first step in getting the bonnet to fit, is to run masking tape along the edges of the body, to protect the paint. Then tape narrow stips of
plywood to that to create the correct bonnet gap.
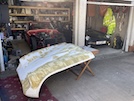
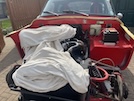 Then I put a couple of layers of dust sheet over the engine and radiator so that there are no sharp corners to dig into the underside
of the bonnet.
Then I put a couple of layers of dust sheet over the engine and radiator so that there are no sharp corners to dig into the underside
of the bonnet.
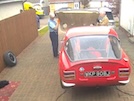 With the aid of two slightly-willing helpers / advisers, we move the bonnet into place, and we check all the gaps, including along the back, under
the windscreen scuttle. This needs a couple of goes, while I go underneath to check the fit of the hinge frame. Lift off - adjust frame - replace a
couple of times before it seems to be right. Then I mark the inside of the bonnet with a pencil, to show where the frame has to be mounted.
With the aid of two slightly-willing helpers / advisers, we move the bonnet into place, and we check all the gaps, including along the back, under
the windscreen scuttle. This needs a couple of goes, while I go underneath to check the fit of the hinge frame. Lift off - adjust frame - replace a
couple of times before it seems to be right. Then I mark the inside of the bonnet with a pencil, to show where the frame has to be mounted.
 This also requires some "off-the-car" discussion and deliberation! We also bend the wee tabs slightly to maximise the contact area with the bonnet,
to try to eliminate any "stress points".
This also requires some "off-the-car" discussion and deliberation! We also bend the wee tabs slightly to maximise the contact area with the bonnet,
to try to eliminate any "stress points".
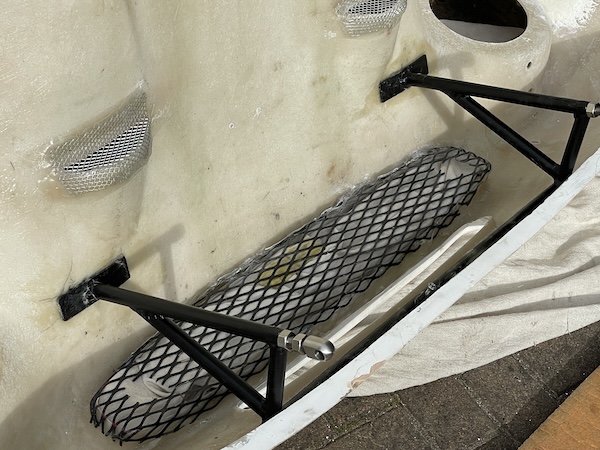
 Then I can start to fix this hinge frame in place, first by embedding it in glassfibre filler (again to spread loads and to fill in any gaps between
the metal frame and the bonnet shell). This shows stage 1 complete!
Then I can start to fix this hinge frame in place, first by embedding it in glassfibre filler (again to spread loads and to fill in any gaps between
the metal frame and the bonnet shell). This shows stage 1 complete!
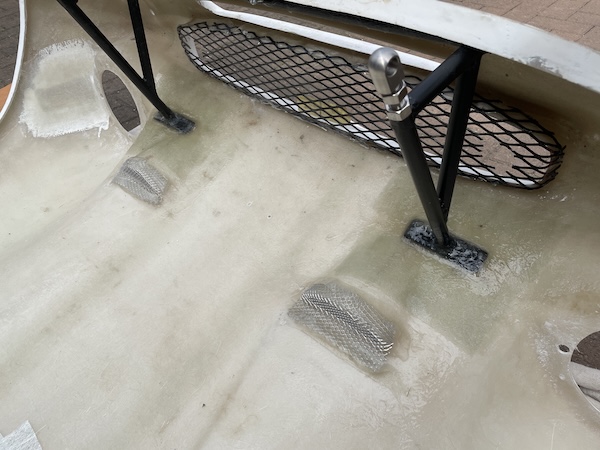
I leave that to dry for a day or two, before I glassfibe the frame in properly. Even with just the filler dried, the frame is already pretty firmly
attached! I cut enough matting for both sides - first a square with a slot in it for the leg to poke through, then 2 to overlap that, front to rear,
then 2 more strips sideways. Each layer is brushed down then pressed with a wee aluminium roller to get the air out and ensure good adhesion.
 So far so good!
 Then I cut another 3 layers of matting to glass in the tube across the front - one layer overlapping the next and again, trying to get all the air
out.
Then I cut another 3 layers of matting to glass in the tube across the front - one layer overlapping the next and again, trying to get all the air
out.
 That looks not too bad!
:: Fitting the Bonnet Catches ::
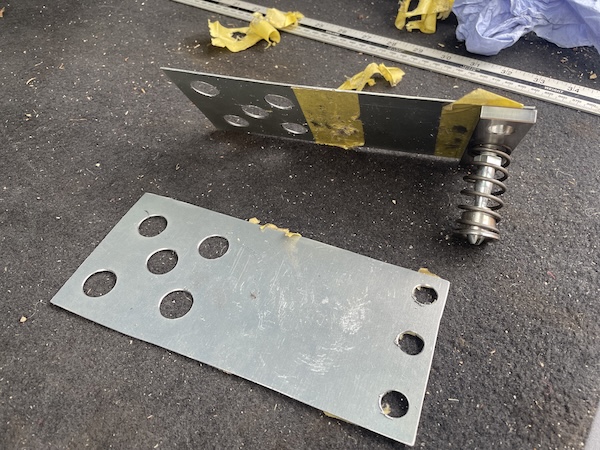
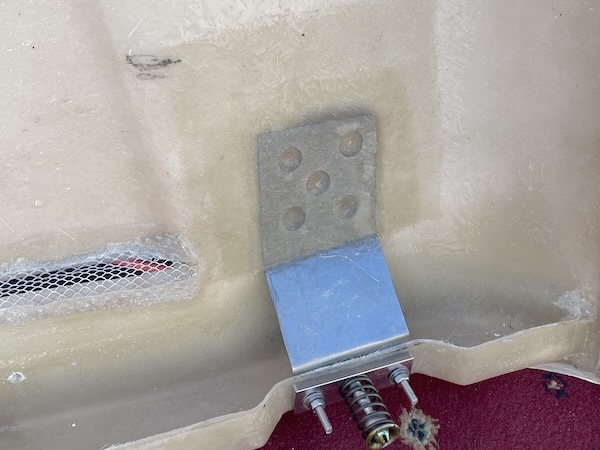
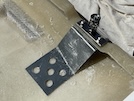
 The bonnet catches are supported by metal bracing plates, that don't come with the bonnet, or with the new pins, so I need to make them up. First
I cut 2 bits of 1mm sheet steel to the right size (measured from the old bonnet), then I mark up the 3 mounting holes for the bonnet pins, and then
5 holes where it is fibreglassed to the inside of the bonnet - those will allow the fibreglass to bond through the holes and create a better joint.
I drill out those holes using a succession of increasing drill sizes and a hole-cutter, then I use that first plate as a template to mark and drill
the second plate.
The bonnet catches are supported by metal bracing plates, that don't come with the bonnet, or with the new pins, so I need to make them up. First
I cut 2 bits of 1mm sheet steel to the right size (measured from the old bonnet), then I mark up the 3 mounting holes for the bonnet pins, and then
5 holes where it is fibreglassed to the inside of the bonnet - those will allow the fibreglass to bond through the holes and create a better joint.
I drill out those holes using a succession of increasing drill sizes and a hole-cutter, then I use that first plate as a template to mark and drill
the second plate.
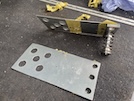 Here's the two plates, all drilled out out.
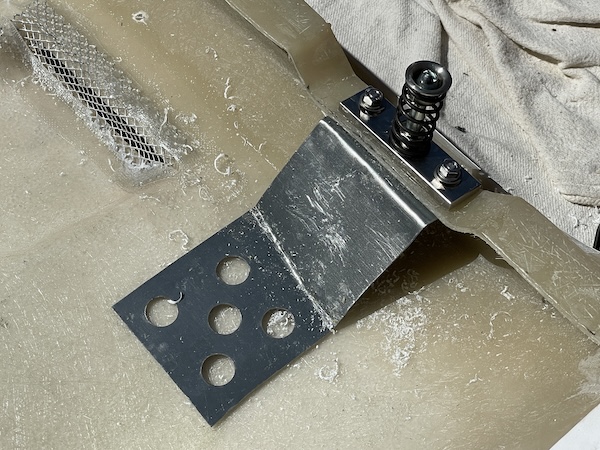
The plate needs a double bend in it, to mount behind the bonnet pin, then bend up to the level of the bonnet, then flatten out to stick to the
underside of the bonnet. That proves to be trickier than it looks, because the bonnet profile means that the plate needs a twist in it, as well as
the up-and-down bend to meet the bonnet at the right angle. It also needs a slight curve across its width to try to eliminate any air gap.
 This means bleedin' ages of "bend-a-bit, try it out, bend it more (or less), try it out, twist it a bit, no not that much", ad infinitum (or ad
nauseam) just for the first plate, as I gradually bend it into the right shape.
This means bleedin' ages of "bend-a-bit, try it out, bend it more (or less), try it out, twist it a bit, no not that much", ad infinitum (or ad
nauseam) just for the first plate, as I gradually bend it into the right shape.
Then I bend the second bracing plate to shape - this is a bit easier than the first one, but still a case of frequent trial and error.
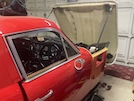
 I lift the bonnet to the front of the car, and with my Technical Director holding it up, I manage to get the hinge pins in.
 Car and bonnet reunited!
Now to fit the bonnet catches themselves. The old latches are still attached to the car, so I need to position the new pins into the rear of the
bonnet to match
up.
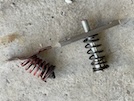 The spring pins are considerably more robust than the ones that were on the car before, so I have to drill bigger holes into the the rear of the
bonnet to match up. They are also slightly longer, even when tightened right up.
The spring pins are considerably more robust than the ones that were on the car before, so I have to drill bigger holes into the the rear of the
bonnet to match up. They are also slightly longer, even when tightened right up.
I fit the pins into the catches, and put a wee blob of red paint on the back end of the spring bolt. Then I lower the bonnet so that the paint marks
the fibreglass. Then with the bonnet back off the car, I drill a larger hole for the central bolt, and smaller holes for the fixing bolts.
 Then I can fix those all together, along with the bracing plates. The plates will be glassfibred to the underside of the bonnet once I know that I
have the catches adjusted properly.
Then I can fix those all together, along with the bracing plates. The plates will be glassfibred to the underside of the bonnet once I know that I
have the catches adjusted properly.
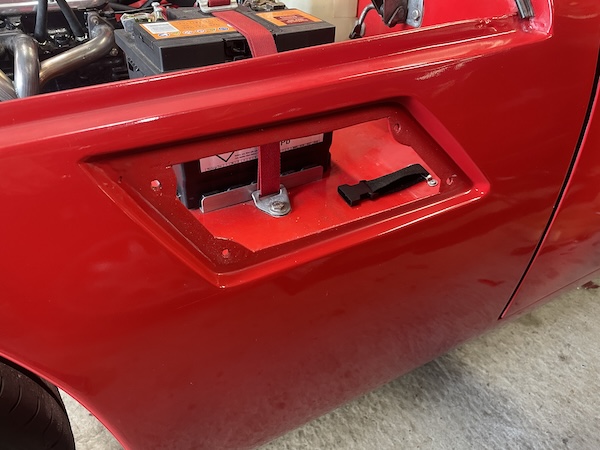
Bonnet back on the car, and I am able to adjust the left-hand catch. The right-hand one, though, needs more adjustment than is available - only a
couple of mm I think, so I need to drill out the holes a fraction more. First attempt helps but not quite enough. I also try adjusting the hinge
pins backwards, but it's just not playing. I think I also need to adjust the front of the bonnet downwards at the hinge, to improve the bonnet gap,
but I don't have time today.
These bonnet catches are a nightmare... the left hand catch engages, but the bonnet is about 5mm to high, even with the pin wound right in. I can't
get the right-hand pin to engage at all - it seems to be lined up, but it just won't engage. I faff around for ages taking it off, adjusting the
mounting holes and putting it back, and also adjusting the hinges, and eventually it goes into place. The left hand side is still too high though...
 The main problem is that the new pins are much longer than the old ones.
Eventually I take the left hand catch apart and take off the lock nut, so that I can wind it in an extra couple of turns. That does the trick, for
that side anyway.
 Eventually, it does all fit into place, but the right-hand catch is still very tricky to engage - further adjustment is required, until a new "plan"
emerges (if you can call it a plan). I realised that the bonnet catches on the bulkhead aren't vertical, and I assumed that was to accommodate the
"angle of entry" of the bonnet pin, but it turns out that the pins need to be angle slightly backwards.I make an angled shim out of a spare bit of
1mm plate to go under the catch to tip it backwards slightly, fit it under the pin, bolt it back up and... it works perfectly! 1 feckin millimetre
equals 4 days of grief...
Eventually, it does all fit into place, but the right-hand catch is still very tricky to engage - further adjustment is required, until a new "plan"
emerges (if you can call it a plan). I realised that the bonnet catches on the bulkhead aren't vertical, and I assumed that was to accommodate the
"angle of entry" of the bonnet pin, but it turns out that the pins need to be angle slightly backwards.I make an angled shim out of a spare bit of
1mm plate to go under the catch to tip it backwards slightly, fit it under the pin, bolt it back up and... it works perfectly! 1 feckin millimetre
equals 4 days of grief...
But... that's the bonnet fitted to the car and adjusted right!
 Then with everything held in place by the bonnet pin mounting bolts, I can remove the bonnet (quick-release hinges help!) so that I can fibre glass
those brace plates into place.
Then with everything held in place by the bonnet pin mounting bolts, I can remove the bonnet (quick-release hinges help!) so that I can fibre glass
those brace plates into place.
:: Windscreen Washer Tubing ::
Next, I'm going to make some wee hose clips for the windscreen washer hoses. TVR just glassed the washer hoses under a layer of fibreglass into the
underside of the bonnet, but I want to do something a bit better. I'm going to glass in little tubing guides to hold the tubes but still leave them
visible (and replaceable if necessary)!
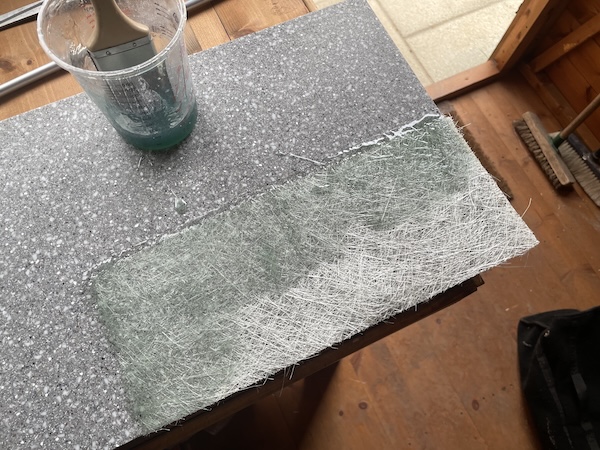
First I need a flat surface, I have a piece of corian composite worktop left over from when I got a new kitchen a few years ago. I spent yesterday
giving it 3 coats of car wax as a releasing agent, and I bought some washer hose, and a bit of aluminium tube that the hose fits through.
 So today, I lay down a coat of resin on that surface - this is about half-way through so I haven't saturated the whole area yet.
 Then I roll over the end, around the metal tube, and lay down a second reinforcing strip.
 Back to these wee clips for the washer hose. I cut the tubing into 1 inch sections, and drill holes in the fibreglass "tail" to help them stick.
 and then fix them into place.
:: Radiator Air Deflectors ::
On to the next task. The old bonnet has wee bulkheads on each side to guide any air coming in the grille, through the radiator, not around it. The
new bonnet doesn't have those, and I'm not sure if I need them or not - photos online show that they're not standard, some cars have them, some don't.
Another plan - I can make them so that they fit to the hinge frame, but not glass them in.
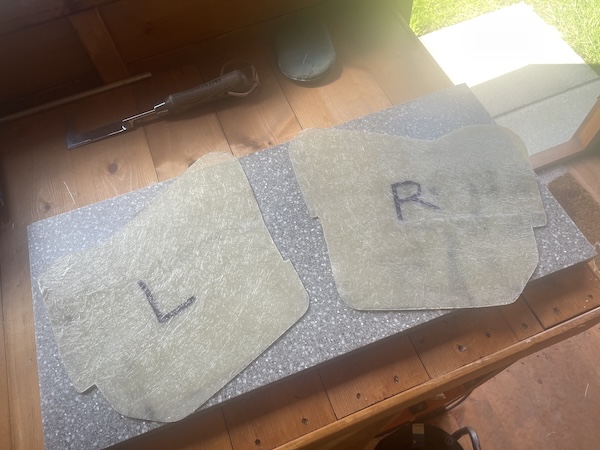
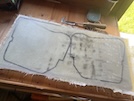
The first step is to make a cardboard template, starting with a big bit roughly the right shape, and then stick bits onto it to align all the edges.
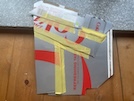 And it looks like this! The shorter right-hand edge goes behind the grille, the cut-out in the top is where the frame mounts to the bonnet, the
cut-out in the bottom fits round the hinge frame tube, and the back edge aligns with the side of the radiator. I can make two of these in fibreglass,
and fit them after the car is painted.
And it looks like this! The shorter right-hand edge goes behind the grille, the cut-out in the top is where the frame mounts to the bonnet, the
cut-out in the bottom fits round the hinge frame tube, and the back edge aligns with the side of the radiator. I can make two of these in fibreglass,
and fit them after the car is painted.
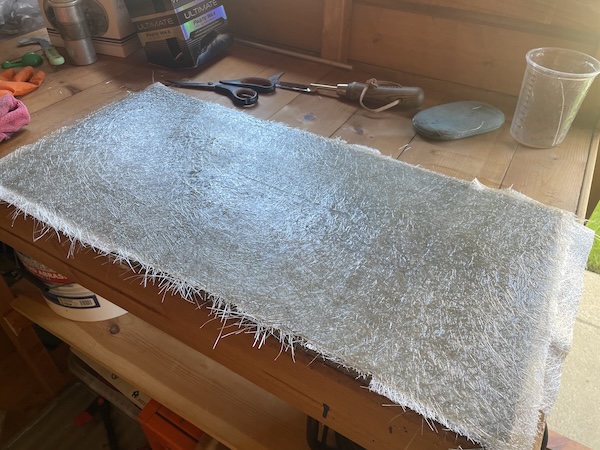
I cleaned up that bit of worktop again, and gave it 4 coats wax as a releasing agent. Then I cut enough matting to cover it in 3 layers, and mixed
up the resin. I brushed down a coat of resin, and then stippled the matting in, rolling the air out between each layer.
 That got me to here...
 Then I used the template to mark out the shapes (making sure to reverse it for the left side!).
 I use an angle grinder with cutting disc to cut out both sides, and sand down the edges. After a bot of trial and error, I have the right
hand side fitting reasonably well.
I use an angle grinder with cutting disc to cut out both sides, and sand down the edges. After a bot of trial and error, I have the right
hand side fitting reasonably well.
At this point I discover that both sides are slightly different, so I have to do a bit of re-shaping of the left side to get it to fit.
 Then I fit them to the bonnet temporarily with white cable ties (I have thousands of those so don't want to use up my black ones at this stage).
All fits well, but now that they are fixed in position, I find that I need to shave a tiny bit off the back edge so that they don't foul on the
radiator and stop the bonnet closing.
Then I fit them to the bonnet temporarily with white cable ties (I have thousands of those so don't want to use up my black ones at this stage).
All fits well, but now that they are fixed in position, I find that I need to shave a tiny bit off the back edge so that they don't foul on the
radiator and stop the bonnet closing.
 Here's the nearside one from under the wheelarch, with the bonnet closed...
 and here's the offside one.
So that's it - I'll take those off again for painting separately.
:: Front Registration Numbers ::
The front registration number wasn't on a plate, but was individual plastic letters fixed to the front grille. The old grille wasn't standard, it
had a horizontal mesh which looked wrong, but now, I realise, made it easy to line up the registration letters and numbers. The new grille is the
"proper" larger diagonal mesh, which looks better, and lets more cooling air through, but I've discovered that you can't line up the letters using
the fixed pegs on the back - the grille mesh gets in the way of correct spacing and alignment.
I can fix this by cutting off the moulded pegs and drilling the back of the numbers or letters, (not all the way through!) and gluing in new pegs,
or using 4mm self-tapping screws from behind, with a spacer plate. The letters are plastic and only 3mm thick, so careful drill control would be
required, because you can't get new letters if you bugger it up (because they're not legal on any car later than 1973). Each peg or screw would have
to be individually marked to fit in a specific hole in the grille.
The other option is to cut little bits out of the grille to position the pegs where they need to be, but I don't want to do that.
 I think about a stick-on black and silver number plate. They're legal provided that the car was registered before January 1973, and is now
registered as "historic". I've seen a few Vixens and Granturas with them, and they look nice. Plus, and it's a big plus, they're easy to fit!
I think about a stick-on black and silver number plate. They're legal provided that the car was registered before January 1973, and is now
registered as "historic". I've seen a few Vixens and Granturas with them, and they look nice. Plus, and it's a big plus, they're easy to fit!
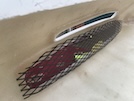
However, after a bit (or a lot!) of a think about this... I bought a metre of thin aluminium bar from B&Q, and cut it in half.
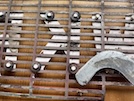
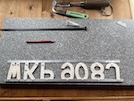 Then I spaced out the letters, face-down, using the stick-on plate as a guide, and marked and drilled 4mm holes at the peg positions along the top
of the letters (the bottom bar in this pic). Then I marked and drilled the holes for the bottom pegs. Miraculously, the holes are so precise that
it all holds together, for now, even without the starlock washers on the back!
Then I spaced out the letters, face-down, using the stick-on plate as a guide, and marked and drilled 4mm holes at the peg positions along the top
of the letters (the bottom bar in this pic). Then I marked and drilled the holes for the bottom pegs. Miraculously, the holes are so precise that
it all holds together, for now, even without the starlock washers on the back!
 Take it all apart again and spray the bars in primer then matt black.
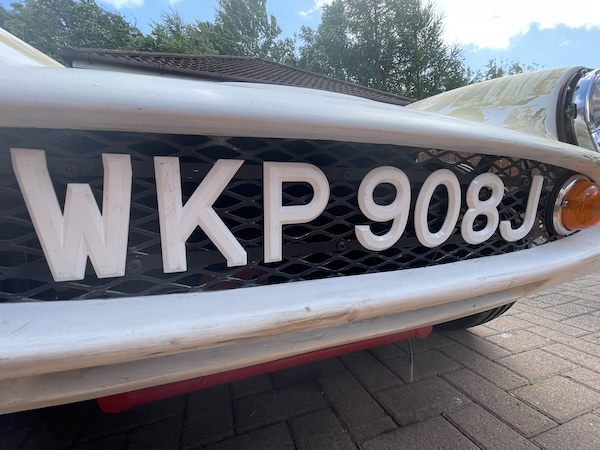
 Then I fit the assembly temporarily to the grille using a couple of black tie-wraps, just to see what it looks like. It's all a matter of opinion,
obviously, but I like that better than the stick-on!
Then I fit the assembly temporarily to the grille using a couple of black tie-wraps, just to see what it looks like. It's all a matter of opinion,
obviously, but I like that better than the stick-on!
I have ordered new starlock washers, so I'll take it apart and fit those, then I'll make proper little screw fittings to hold it onto the
grille, rather than cable ties.
First, I mark on the frame, where to drill holes that will line up with existing holes in the grille.
Then you take another bit of that aluminium bar (or aluminum if you're American - although I read yesterday that the American pronunciation is
technically correct) - periodic tables, convention for naming of elements etc. Anyway, you cut it into strips about 2 inches long, and drill a 5mm
hole in the middle of each bit, then paint them all black.
Then I rake through my tin of wee bolts and find 6 M5 cap screws, spring washers and wee nuts.
Right - next I cut through the tie wraps and take the reg numbers off the grill, and drill 5mm holes where I marked them.
 I put down a towel to protect the face of the letters, then use a 1/4 inch socket and a wee hammer to knock the starlock washers onto the pegs on
the rear of the letters. No breakages!
I put down a towel to protect the face of the letters, then use a 1/4 inch socket and a wee hammer to knock the starlock washers onto the pegs on
the rear of the letters. No breakages!
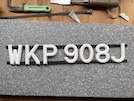
 Finally, I use the cap screws and brackets i made, to fit the reg numbers back on to the grille. That looks all right, that does!
 Here's the view from behind the grille.
I'm happy with that! I'll need to take it all off again though when the car goes in for painting (including painting the grille mesh itself).
:: Assembling the Bonnet ::
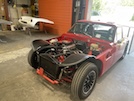
I'm going to make sure that everything else definitely goes together before I send the car off for painting. First task is to lift the car and
remove the front wheels, so that I can replace the front wheel arches. These are much bigger and more substantial (i.e. less bendy) than the ones
in the S, so it's fiddly and takes a while.
The right hand arch also has a bolt supporting the heater hose, and two wee bolted clips holding the wiring loom.
 But it's in!
Then it's on to replacing the wiring loom to the front lights etc. I've got new headlights, new sidelights and new indicators, so there's a bit of re-wiring to be done!
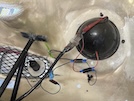
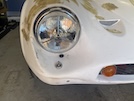
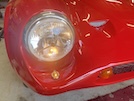
First the headlights. The new headlights have built-in side lights or pilot lights, so I need to make a new hole through the headlight bowl and put
a wee grommet in. Then I insert the bowl, connect up the new headlight and install it into the bowl. A wee check with a test probe to make sure that
main, dip and side lights are all working.
I'm also going to install the original tiny Royal Enfield side lights just for the right look, so I fit those into the hole.
Then I wire up the indicators (which come without bulbs or wiring) and install them in the holes I made in the grille.
 So, after a bit of graft, the front lights are all installed and working!
 The wiring is a bit of a mess though - I need to tidy that all up before I can call it "finished" - I think I'll maybe replace the connectors
with tidier waterproof ones as well.
The wiring is a bit of a mess though - I need to tidy that all up before I can call it "finished" - I think I'll maybe replace the connectors
with tidier waterproof ones as well.
 Next, the windscreen washers. I install the nozzles in the rear of the bonnet, and then run the hose up the wee tube brackets I made.
 I also install the little brackets for the webbing straps that prevent the front of the bonnet hitting the ground when it's open.
I take out each of the bonnet catch bolts (one at a time so that I don't move them!) and cut about half an inch off each of the bolts, then check
that the bonnet still closes ok.
I tape up some of the wiring to the front lights and indicators, but I don't like those crimpy-on connectors - I think I'll replace them all with
soldered bullets once I take the loom back off.
Front wheels back on, and lower the car to the ground.
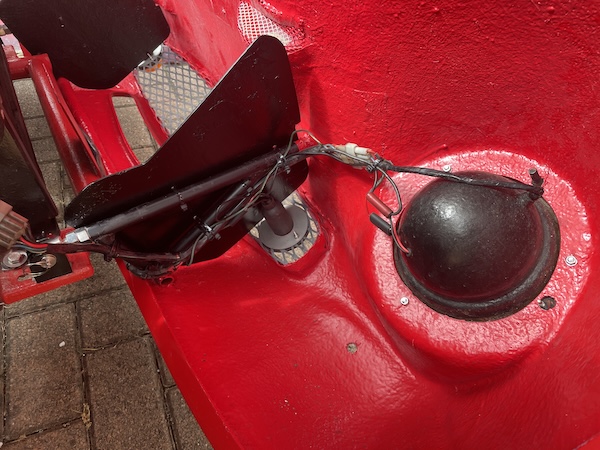
 Last little thing - the rubber grommets under the headlights, that allow you to tighten the screw that holds on the headlight trim ring. The
grommets won't fit, because the fibreglass is too thick - much thicker than the old bonnet. I grind away the rear of the hole with a ball grinder
(which should NOT be used without reading the instructions to clarify its exact purpose), and then insert the grommet using a bit of thin string
around it to pull it through from the rear.
Last little thing - the rubber grommets under the headlights, that allow you to tighten the screw that holds on the headlight trim ring. The
grommets won't fit, because the fibreglass is too thick - much thicker than the old bonnet. I grind away the rear of the hole with a ball grinder
(which should NOT be used without reading the instructions to clarify its exact purpose), and then insert the grommet using a bit of thin string
around it to pull it through from the rear.
And that, I think, is it! I've already tried the badge and bumpers and removed them again, but otherwise, everything is back together as it should
be!
I need to take all the fittings back off the bonnet before I take it to the paint shop - except for the headlights and indicators, which I'll leave
on until I drive it there - it's only 4 miles or so but it woud be just my luck to get spotted by the one police patrol that dares to venture out
on the mean streets here...
The drive there is easy, then it takes me around 10 minutes to remove both headlights and front indicators, and the associated wiring, and leave the
car with him.
:: Painting ::
A couple of days later, the paint shop phones.
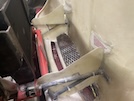
 There's the car, there's the bonnet over in the corner. He says that as he has been rubbing down the shite-coloured filler that I used, he has found
that it has a few star cracks in the top, and stress line fractures under the front valance, which he's going to have to grind out and refill.
There's the car, there's the bonnet over in the corner. He says that as he has been rubbing down the shite-coloured filler that I used, he has found
that it has a few star cracks in the top, and stress line fractures under the front valance, which he's going to have to grind out and refill.
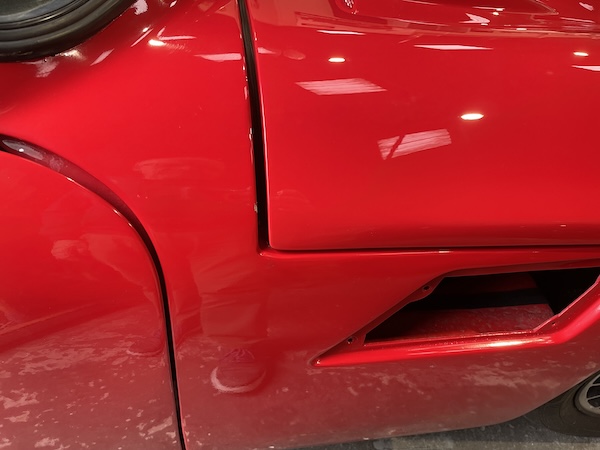
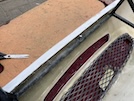
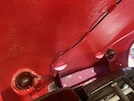
 The arrows here point to those star cracks, where something has pushed up from underneath.
 Here's a couple at the rear driver side... THey aren't as bad as they look in the photo: the jobby-coloured filler does exaggerate them a bit!
I'm not going to show photos of them all - those two are the worst, the others aren't so bad...
He thinks that the stress cracks under the valance are because the bonnet has been allowed to "overextend" forwards, and has cracked around that
hinge bar. I'm not so sure...
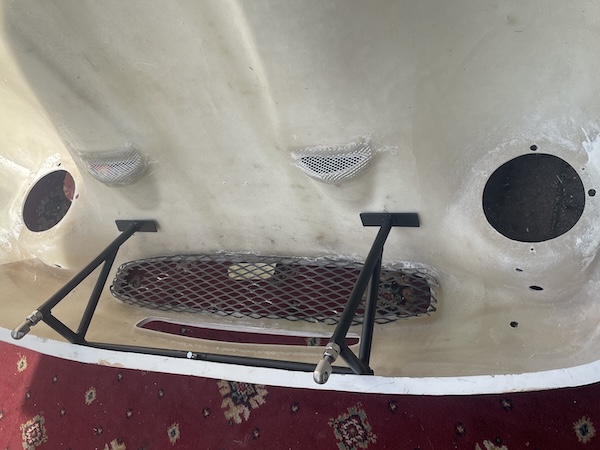
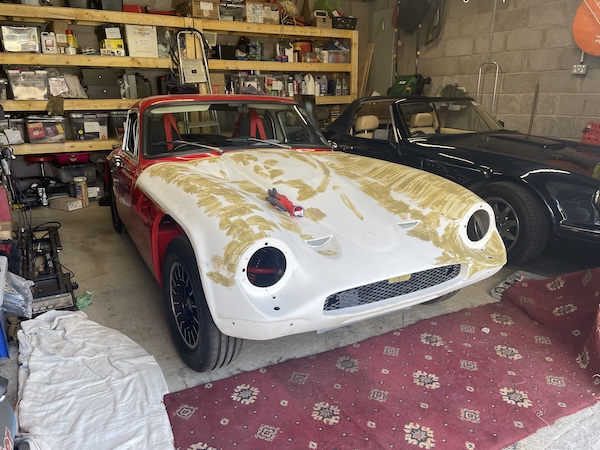
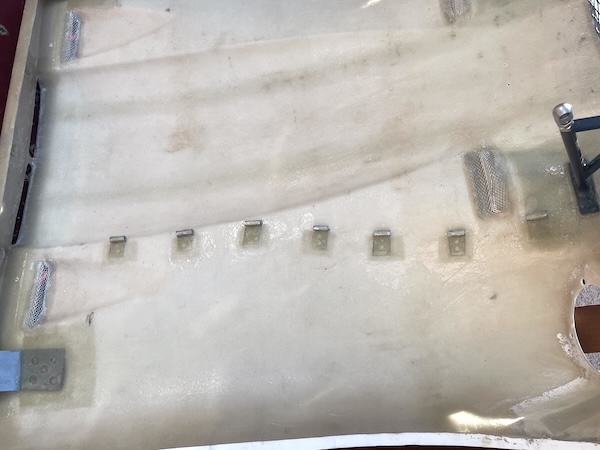
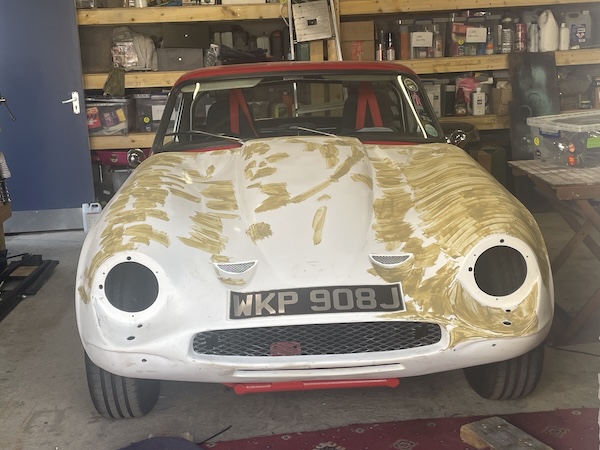
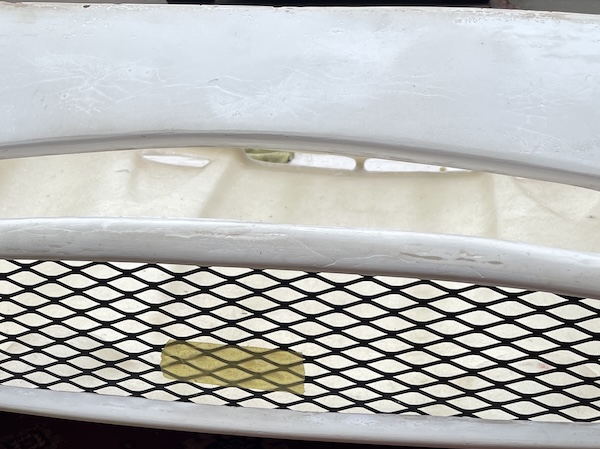
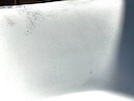
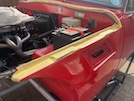
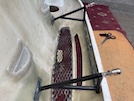
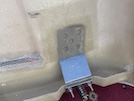
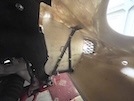
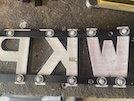
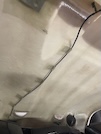
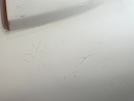
 Here's a photo taken 4 days after the bonnet was delivered, while I was fitting the grille. At this point, the hinge bar hadn't been fitted - I
still had to get the guys around to test fit it so that I could glass the hinge frame o in the right place. All I had done at this point was cut
holes for lights, vents etc. You can see the cracks (which I thought were scratches) under the finish, in the top of the photo (the bonnet is
upside-down here!)
Here's a photo taken 4 days after the bonnet was delivered, while I was fitting the grille. At this point, the hinge bar hadn't been fitted - I
still had to get the guys around to test fit it so that I could glass the hinge frame o in the right place. All I had done at this point was cut
holes for lights, vents etc. You can see the cracks (which I thought were scratches) under the finish, in the top of the photo (the bonnet is
upside-down here!)
I can't think how the top of the bonnet could have become star-cracked, unless it was when I was moving it on to that wee wooden table. I was careful
though, and don't remember any particular damage-causing incidents (although that was now 4 months ago, so I could easily have forgotten by now).
Anyway, however it happened, it's my problem now...
He has also spectrographed the paint and says that the closest match isn't Ford Rosso red (as it says on the respray receipt that I got in the
folder with the car), but Daihatsu Mistic Red (that's how they spell it). He has ordered the paint, and it does look exactly right...
A few days later, he has ground back the star cracks and re-glassed them and rubbed them down. He says there's still a bit of smoothing to be done.
The cracks underneath the valance have also been treated. It's definitely looking a lot better close-up!
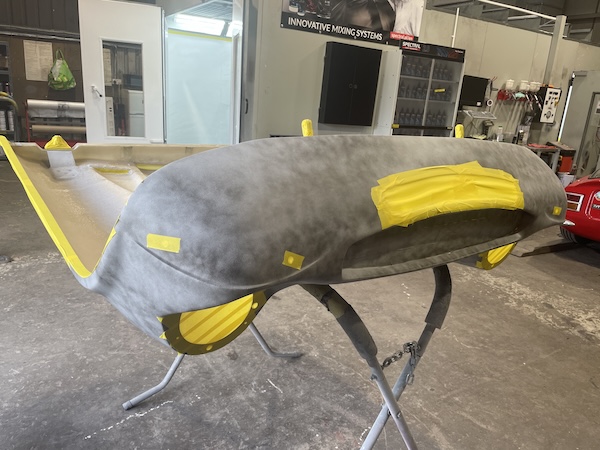
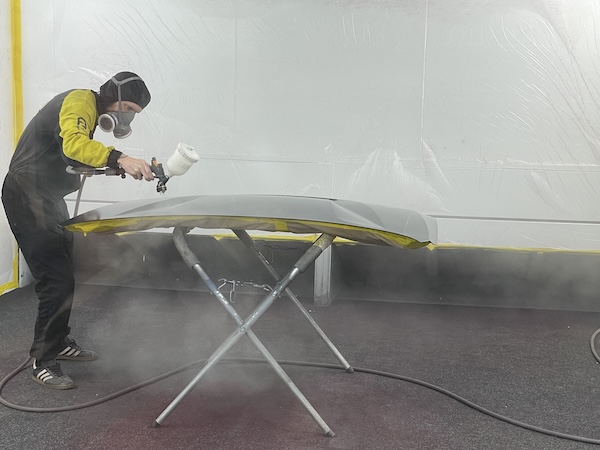
 Then the bonnet is filled and shaped, with a primer over the top, and then a guide coat for blocking down. All of the cracks, and most of the
pinholes, are now filled and will be ready for final painting soon.
Then the bonnet is filled and shaped, with a primer over the top, and then a guide coat for blocking down. All of the cracks, and most of the
pinholes, are now filled and will be ready for final painting soon.
 Then he masks off the underside - grille, hinge brackets etc - and paints that with a stonechip with red over the top.
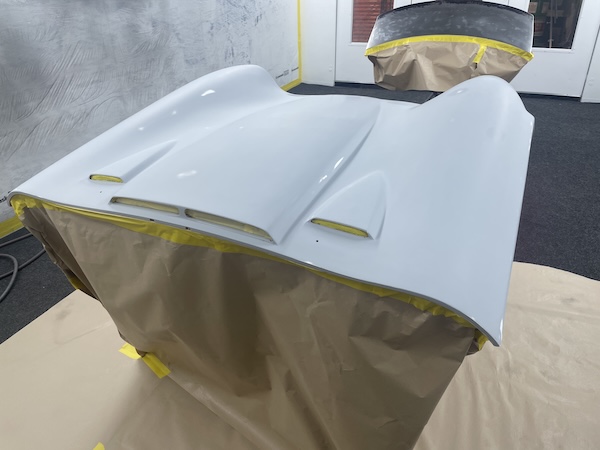
 The underside is now painted, and the top side has been primed and rubbed down, ready for another final primer.
 It's looking pretty good though!
The day of collection is a scary time - will the paint be ok? Memories of the Lexus paint job 13 years ago, come flooding back. I'm not emotionally
resilient enough to go through all that shit again.
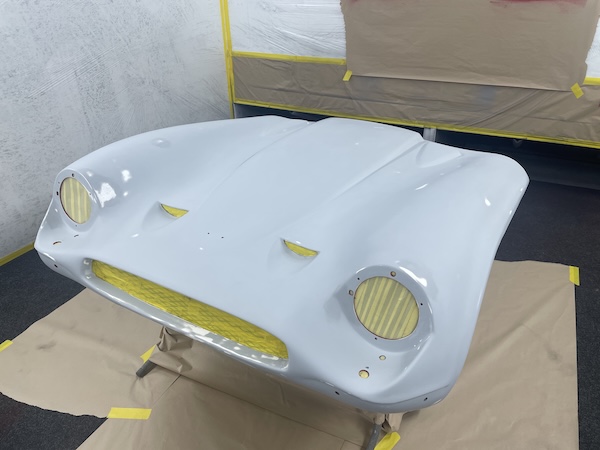
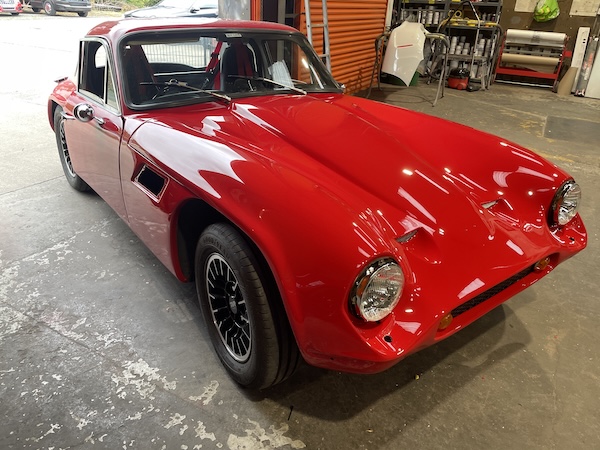
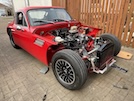
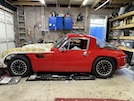
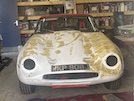
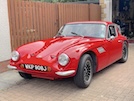
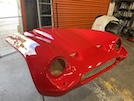 I needn't have worried - it looks great!
 He has been waiting for me to arrive, to help him to fit the bonnet to the car. That takes about 5 minutes. The paint match and finish looks perfect!
 He goes back to spraying the bonnet for a BMW...
 while I get on with fitting headlights and indicators so that it's legal for driving home. Apart from the missing front registration number.
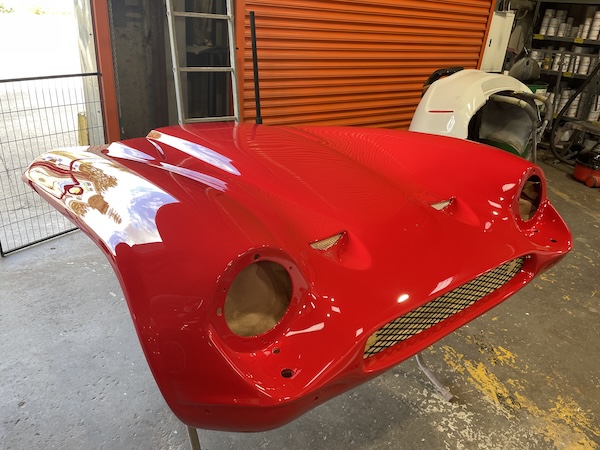
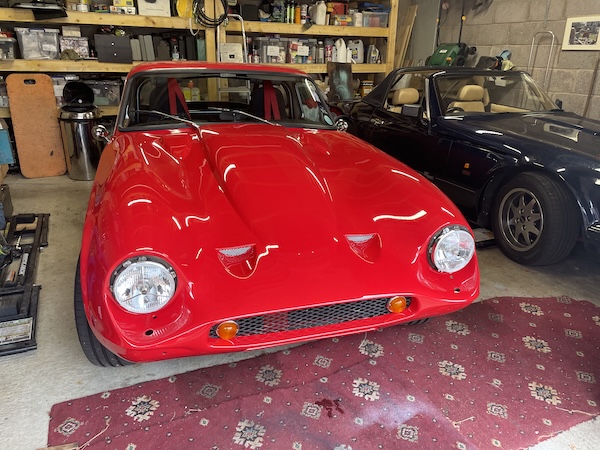
 Then it's home, ready for fitting the rest of the badges and shiny bits. (Ignore the wee puddle of water in front, that's clean pure rainwater that
ran out of the front of the bonnet when I opened it.)
Then it's home, ready for fitting the rest of the badges and shiny bits. (Ignore the wee puddle of water in front, that's clean pure rainwater that
ran out of the front of the bonnet when I opened it.)
Then I can "final fit" all of the attachments, starting with the wiring to the lights.
 Then I cable tie all the wiring into place, rather than leave it hanging loose like it was when I got it, and add the two wee dividers I made to
help direct air through the radiator, rather than into the wheelarch.
Then I cable tie all the wiring into place, rather than leave it hanging loose like it was when I got it, and add the two wee dividers I made to
help direct air through the radiator, rather than into the wheelarch.
Then I work through the other items on the list. First the headlight rings.
 Then the washer jets and the hose inside the bonnet, through the wee clips that I moulded in.
 Then the new (proper) sidelights.
Then the bonnet badge and the two chrome side vents (Ford Zephyr!).
When I go to fix the registration number in the front grille, I remember that the black paint on the grille has worn through in places, partly I
think because of acetone from the fibre-glassing, and also just through getting moulded into shape for fitting. I decide to paint it again before
fitting the numbers. Rather then mask off the whole of the rest of thr car, I spray some paint into the cap off the can, and paint it on with a wee
brush. It still takes ages, but looks a lot better.
That leaves just a couple of quick wee jobs - fit the reg number on the grille, then the quarter bumpers.
 It has been a toil - about 50 hours of my time (free) plus about 40 hours in the paint shop (not free!), but it's looking good!
 The first step is to strip off all the bits from the old bonnet, to transfer on to the new bonnet. First I label up all the wiring and remove the
whole wiring loom from the front end of the car. I'm going to tidy that up when I re-install.
The first step is to strip off all the bits from the old bonnet, to transfer on to the new bonnet. First I label up all the wiring and remove the
whole wiring loom from the front end of the car. I'm going to tidy that up when I re-install.
 Within a couple of hours, I have removed all these bits (albeit there's only one headlight in the box). The headlights were a bugger by the
way - the mounting screws were rusted to shit and I had to drill them out...
Within a couple of hours, I have removed all these bits (albeit there's only one headlight in the box). The headlights were a bugger by the
way - the mounting screws were rusted to shit and I had to drill them out...
 And here's the front of the car de-electrified!.
 Next, I prop the bonnet open and remove the two hinge bolts. The bonnet can then be moved away from the car and laid down on a couple of blankets
for further disassemply.
Next, I prop the bonnet open and remove the two hinge bolts. The bonnet can then be moved away from the car and laid down on a couple of blankets
for further disassemply.
 That gets the car to here...
 The bonnet badge is held on with a couple of wee nuts...
 The front grill is just held on by being pressed into a full tub of isopon behind the front valance. I'm able to crumble it off with a pair of
pliers, and then remove the indicators. I'll give it a wee matt black paint before I put it back. Or I might try to get a bit off the proper
diamond mesh.
The front grill is just held on by being pressed into a full tub of isopon behind the front valance. I'm able to crumble it off with a pair of
pliers, and then remove the indicators. I'll give it a wee matt black paint before I put it back. Or I might try to get a bit off the proper
diamond mesh.
 And here it is, with everything removed, ready for the new bonnet when it comes!
 They are held on with star washers on the back. The letters are only plastic so the likelihood of breaking one of the wee pegs is high!
 I find this old worn out gardening tool, that has been sharpened so often there's nothing left of it...but it's ideal for prising off star washers!
Letters all off, and no pegs broken! Two star washers lost, pinging over my shoulder into a far corner... I'll flatten all the remaining washers
with a hammer for re-use. I'm sure I have some more to replace the missing ones.
I find this old worn out gardening tool, that has been sharpened so often there's nothing left of it...but it's ideal for prising off star washers!
Letters all off, and no pegs broken! Two star washers lost, pinging over my shoulder into a far corner... I'll flatten all the remaining washers
with a hammer for re-use. I'm sure I have some more to replace the missing ones.
 I also spray the radiator with VHT matt black paint that I have lying around, then I paint the front of the chassis that is inaccessible when the
bonnet is on.
I also spray the radiator with VHT matt black paint that I have lying around, then I paint the front of the chassis that is inaccessible when the
bonnet is on.
 I also remove these wee vents in the front wings - originally the roof pillar vents off a Ford Zephyr!
 These two brackets on the chassis are where the hinge bolts on. I've ordered new ones, so I remove these and paint the exposed chassis.